Corner-to-Corner (C2C) Crochet Coaster Pattern
Learn corner-to-corner crochet on a small square: six increase rows, five decrease rows and 36 tiles, with a single crochet border to straighten the edges.
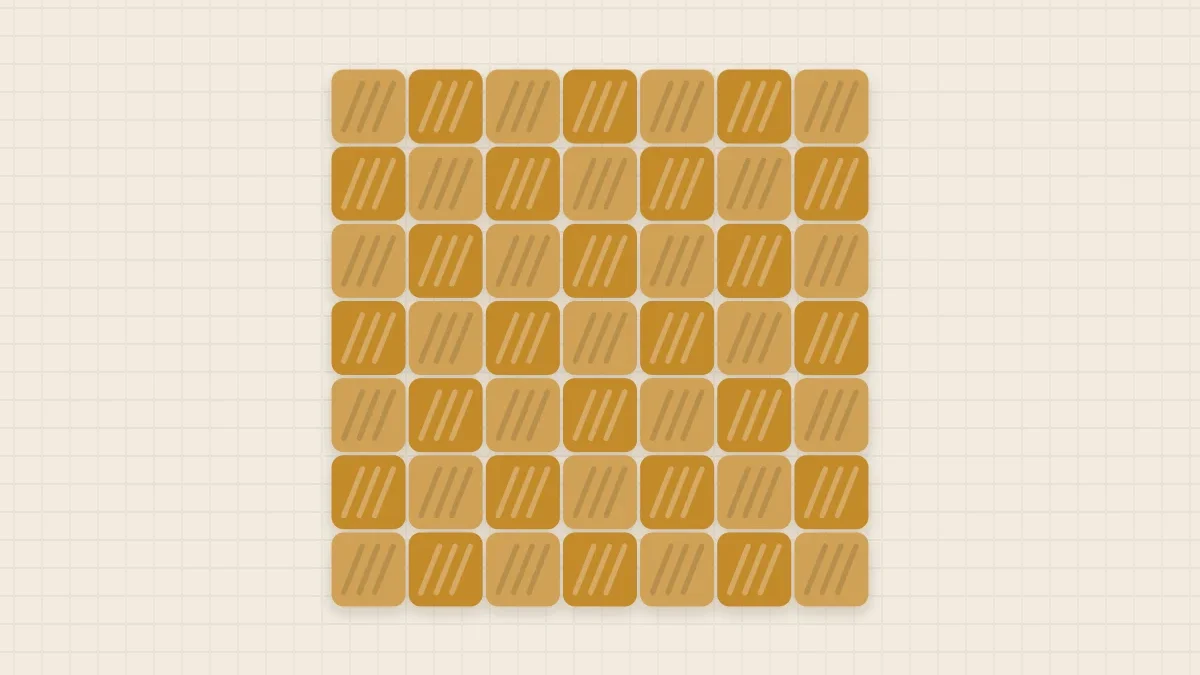
Pattern at a glance
Materials
- Worsted weight (#4) cotton yarn, one color
- Yarn needle
- Scissors
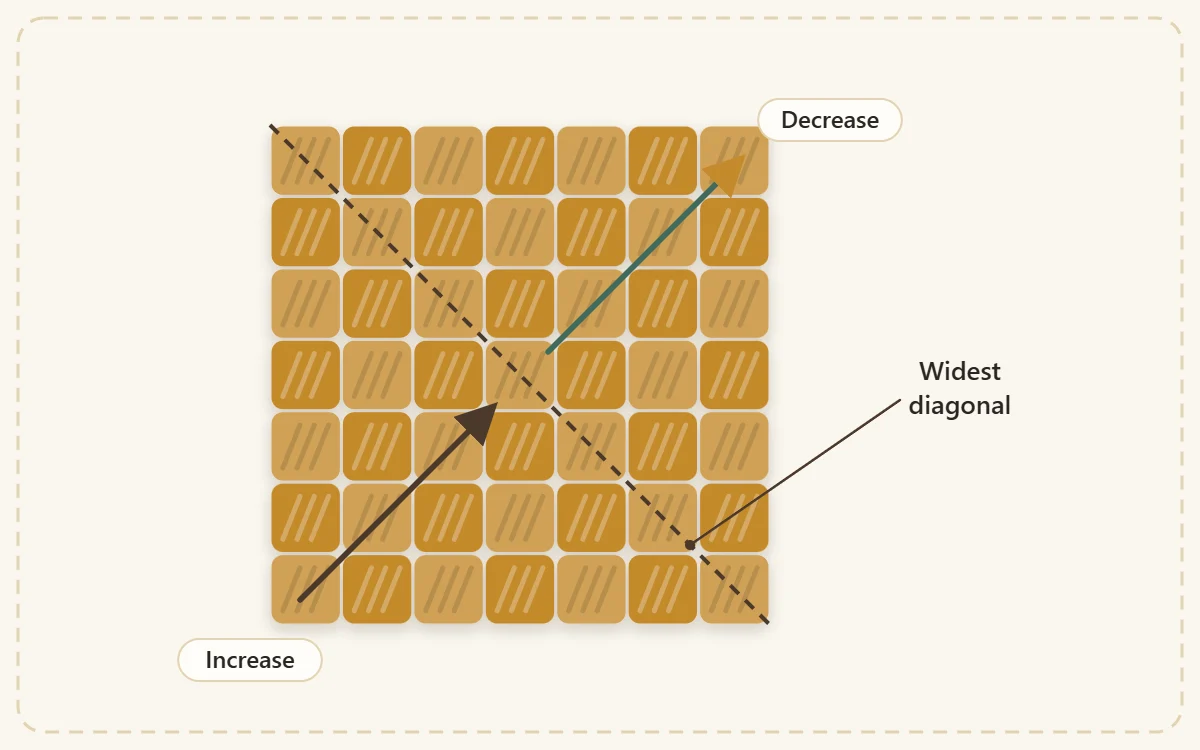
Corner-to-corner crochet, usually shortened to C2C, builds a square on the diagonal. You start with a single small block in one corner, add one block per row until the piece is as wide as you want, then take one block away per row until you reach the opposite corner. A coaster is a good size for learning it: the whole square is only 36 blocks.
This pattern uses US crochet terms and the standard double crochet version of C2C.
What You Need
- Worsted weight (#4) cotton yarn, one color
- US H-8 (5 mm) crochet hook, or US G-6 (4 mm) for a denser, smaller square
- Yarn needle and scissors
At 6 tiles per side the coaster usually lands somewhere around 4.5 in (11.5 cm) before the border. C2C gauge varies more than most stitches, so treat that as a rough guide and check your own work as described below.
Abbreviations and Notes
- ch — chain
- sl st — slip stitch
- sc — single crochet
- dc — double crochet
- sp — space
- tile — one block: a chain 3 plus 3 dc
You turn the work at the end of every row. The chain 3 at the beginning of each tile is not counted as a stitch; it forms a small loop at the side of the tile, called the chain-3 space here, and that loop is where the next row attaches.
How a C2C Tile Works
Every tile is the same: three chains standing up, and three double crochets beside them. The tiles of one row sit at right angles to the tiles of the row before, which is what produces the woven, diagonal look.
There are two ways to make a tile. The first tile of an increase row is worked into a fresh chain of six. Every other tile is anchored to the row below with a slip stitch into a chain-3 space, followed by chain 3 and 3 double crochets in that same space.
Increase Rows: 1 to 6 Tiles
- Row 1: Ch 6. Dc in the 4th ch from the hook and in each of the next 2 ch. (1 tile)
- Row 2: Ch 6, turn. Dc in the 4th ch from the hook and in each of the next 2 ch. Sl st in the ch-3 sp of the tile from row 1, ch 3, 3 dc in the same sp. (2 tiles)
- Row 3: Ch 6, turn. Dc in the 4th ch from the hook and in each of the next 2 ch. *Sl st in the ch-3 sp of the next tile, ch 3, 3 dc in the same sp; repeat from * 1 more time. (3 tiles)
- Row 4: Ch 6, turn. Dc in the 4th ch from the hook and in each of the next 2 ch. *Sl st in the ch-3 sp of the next tile, ch 3, 3 dc in the same sp; repeat from * 2 more times. (4 tiles)
- Row 5: Work as row 4, repeating from * 3 more times. (5 tiles)
- Row 6: Work as row 4, repeating from * 4 more times. (6 tiles)
Each increase row is one chain-6 tile plus one tile in every tile of the previous row, so the count rises by exactly one. After row 6 the piece is a triangle of 21 tiles.
Decrease Rows: 5 to 1 Tiles
To decrease, you leave out the chain 6 at the start and leave out the tile at the end. Slip stitches carry the yarn across the tile you just made so the row can begin one block further in.
- Row 7: Turn without chaining. Sl st in each of the 3 dc of the tile just made, then sl st in its ch-3 sp. Ch 3, 3 dc in the same sp. *Sl st in the ch-3 sp of the next tile, ch 3, 3 dc in the same sp; repeat from * 3 more times. Sl st in the ch-3 sp of the last tile and stop there. (5 tiles)
- Row 8: Work as row 7, repeating from * 2 more times. (4 tiles)
- Row 9: Work as row 7, repeating from * 1 more time. (3 tiles)
- Row 10: Work as row 7, working the starred section once only, with no repeats. (2 tiles)
- Row 11: Work as row 7, leaving out the starred section altogether. (1 tile)
The square is complete: 11 rows and 36 tiles, 6 along every side. Do not fasten off if you plan to add the border in the same color.
Watch out
The most common slip is making a tile in the last chain-3 space of a decrease row. That space gets a slip stitch only. If a row has as many tiles as the one before, this is where it went wrong.
Getting the Size Right
Because the fabric grows diagonally, measure along a straight side edge, not across the row you are working. After row 4, lay the triangle flat and measure one short edge, then divide by four to get the width of one tile. Multiply by the number of tiles you plan to work.
- If 6 tiles would be too large, go down a hook size or stop increasing at 5 tiles.
- If 6 tiles would be too small, increase to 7 tiles before you start decreasing. Row 7 then has 7 tiles, and the decrease rows run 6, 5, 4, 3, 2, 1 for 13 rows and 49 tiles in total.
For target measurements, the crochet coaster size guide explains how much margin to leave around a mug or glass. If you are unsure which hook suits your yarn, see what hook size to use for coasters.
Single Crochet Border
C2C edges are stepped, and a round of single crochet straightens them. Each tile presents either a chain-3 loop or the side of a double crochet along the edge; work into those loops and around those posts.
- Border: Ch 1 (does not count as a st). *Work 3 sc along the edge of each of the 6 tiles on this side, then 3 sc in the corner; repeat from * 3 more times, sl st to the first sc. (84 sc: 18 per side plus 3 in each corner)
If the border ruffles, your tiles are narrower than three single crochets. Pull it out and work 2 single crochets per tile instead, which gives 12 per side and 60 in total with the corners.
Finishing
Fasten off and weave in both tails; the starting tail sits in one corner and the final tail in the opposite one. A fresh C2C square is often slightly diamond shaped, so pin the corners out square and follow the steps for blocking crochet coasters. Check the yarn label before washing.
Frequently asked questions
How many tiles wide should a C2C coaster be?
Six tiles per side is a common size in worsted weight cotton with a 5 mm hook. Measure one tile on your own work and use 5 or 7 tiles if your gauge calls for it.
How do I know when to start decreasing in C2C?
Start decreasing when one straight side edge of the triangle is as long as you want the finished coaster to be. For this pattern that is after the row with 6 tiles.
Why is my C2C square not square?
Count the tiles in each row; an extra tile at the end of a decrease row is the usual cause. A slight diamond shape with correct counts can be pinned square when blocking.